Download PS4 9.04 Jailbreak
Step 1: Download PS4 9.04 Jailbreak and GoldHEN
How to Jailbreak PS4 9.04 Full Guide With GoldHEN Payload
PS4: How to run the PS4 9.04 Jailbreak (full guide with GoldHEN payload)
People who are new to the PS4 scene and joining us on their shiny 9.04 PS4 seem to be a bit confused about how to run the 9.04 Jailbreak, and in particular how to inject payloads. Here’s a full guide on how to run the PS4 9.04 Jailbreak, from start to finish.
0. Upgrade your PS4 to 9.04
First of all, if your PS4 is not running firmware 9.04, you might want to upgrade it to that firmware. Check here our FAQ as to whether you want to upgrade or not, and once you’ve made your decision.
Note: if you’re on firmware 9.50 or higher, you can’t go back to 9.04 and you will not be able to run the Jailbreak. So be careful not to update to 9.50 by mistake
1. Prepare the magic USB stick
Note: This step is only required once. You’ll need to use the USB stick every time you Jailbreak, but this preparation step is only needed the first time.
The PS4 9.04 Jailbreak requires part of the exploit to be injected from a specifically crafted USB stick. You’ll need a dedicated USB stick for this, as it will be required each time you jailbreak the console, so use one that you don’t need for anything else. You don’t need anything huge, the image you’ll copy there is 4MB.
Download the file from the pOOBs4 Jailbreak’s
Plug your USB stick into your computer. You don’t need to format it, as the next step will do that for you.
Download and install a tool to write the img file to your usb stick, such as Win32 Disk Manager
Write the img file you just downloaded onto your USB stick. See the screenshot from the Jailbreak’s github for reference:
Your magic usb stick is now ready!
2. Note your PS4’s IP Address
You’ll need to know your PS4 IP address in order to send payload to it. Before starting the Jailbreak process, go and note down your console’s IP address:
Note down your PS4’s IP address in Settings > Network > View Connection Status
3. Run the Jailbreak on your console
With your PS4 running firmware 9.04, and your magic usb stick in hand, let’s proceed to actually running the exploit.
When you reach the exploit page, you will see a loading screen

If the first step of the exploit (the webkit exploit) works, you will see a message asking you to insert the USB stick.
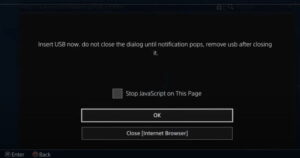
Go ahead and plug the usb stick (do not click the “ok” button of the dialog box!). A message saying “This USB Device Storage’s file system is unsupported” should pop up on the upper left of your screen
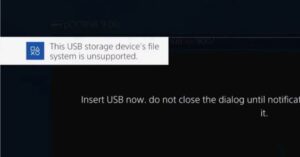
After that message has appeared, go ahead and click “ok” on the dialog box. You should now see a message saying “Awaiting payload
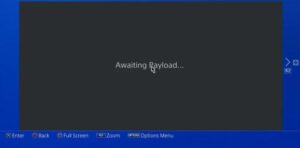
Your PS4 is now technically Jailbroken. Remove the usb stick from your PS4.
4. Inject a Payload
You will now be injecting a “payload”, that is, unsigned code that will run on your PS4. This can be something as simple as a bit of code that will be dumping some files from your PS4 firmware onto a disk, or run an ftp server on your PS4, or a full fledged Custom Firmware such as GoldHEN or Mira.
In this example, we’ll be injecting GoldHEN, but note that any compatible payload would work at this point.
Note: The help image from NetCat GUI below says you should run the “binloader” payload. Technically the Jailbreak is already awaiting a payload so you can ignore this, this time (once you’re running e.g. GoldHEN though, you’ll want to run a binloader from the PS4 in order to accept more payloads)
Run Netcat GUI on your PC. Make sure the IP address is the one of your PS4, that the port is 9020, and load the .bin file for GoldHen that you just downloaded. Then click “inject payload”.
If everything works as expected, your PS4 should display that GoldHEN has been loaded successfully

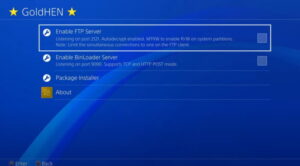
To confirm that everything is in order, you can go to the PS4’s “Settings” menu, and you should see GoldHEN in there
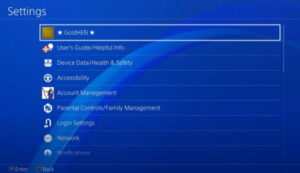
That’s it! Now Your PS4 9.04 Is Jailbreak.
